What Are Lesson Previews?
Lesson previews are free lessons in your course that let prospects see and sample your class prior to buying and registering.
As a creative teacher, previews let your prospect see and hear how you communicate, how much expertise you have, and how your content will help them reach their goals.
Where To Put Free Previews
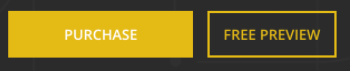
Many people place the course outline (or curriculum) on the sales page. There you can see all the top-level sections and child lessons.
If you have configured any lessons to have a free preview, the outline should allow shoppers to preview a lesson by clicking the view lesson icon.


Some learning management systems let you access the free preview at the course level.
How To Create Free Previews
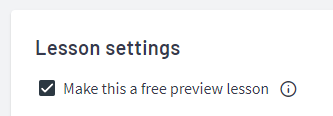
When you upload videos to your content management system, such as www.Thinkific.com or www.Teachable.com, you can specify whether you want your course to be available as a free preview.
Offering Previews Via A Free Mini Course
If your learning tech system doesn’t allow you to offer free previews of lessons, you may be able to configure a small mini-course with free access to lessons.
You can then use the free mini-course to offer free previews so prospects can learn about your teaching style and skills.
At the end of your mini-course, you can have a “What’s next” video or “If you’re interested in more” pdf that provides links and an overview of your full premium course.
How Free Previews Reduce Buyer Risk
Previews provide buyers with additional information, helping them make more confident decisions about whether to make a purchase..
Some of the things that free previews help with include:
- Matching the right course for their skill level
- Seeing and hearing the course quality
- Verifying the teaching style is right for them
- Aligning the course lessons with their goals
You’re Not Click Bait
Your preview video will let them know that you are the real deal. You want your prospect to know you are a creative expert who teaches others.
You want them to see that you care about your craft and have years of experience creating things that students want to learn. Remember, your course will help them learn faster than slowly and painfully learning without you.
They will see that you are not a slimy sales or marketing person trying to push them into buying some internet digital product.
Using Words At The Right Skill Level
Are you using words that your prospects will understand? I’m talking about functional trade words that may be too advanced.
If your course is for beginner artists, are you speaking using beginner and intermediate art words? I’m not suggesting to limit your students, but they need to be able to understand you at each step.
This also affects the order of your sections and classes. You will want to teach words and concepts in earlier courses followed by earlier building block terms in later lessons or courses.
Demonstrate Your Teaching Styles
Use your class previews to demonstrate a wide range of teaching styles.
First, you’ll want to have a lesson that shows you talking directly into the camera. This will demonstrate your conversational communications skills speaking directly to the student in a coaching manner.
Second, you’ll want to have a lesson that shows you teaching your craft – such as playing the piano, mixing audio, or sewing a dress. This may be a more complicated scene, but you must demonstrate how comfortable you are doing your thing while simultaneously explaining what you are doing to the student.
Third, you can have a lesson that shows you teaching slide material by reviewing words, tips, sequences, steps, components, and other facts for your course. You’ll want to say a variation of what is on the slide, but hit key points and add color without being monotone (Like Ferris Bueller’s teacher). You don’t want to simply speak word for word what is on your slides.
How Fast Does The Course Teacher Speak?
Some students may struggle with teachers who speak too fast.
Having prospects hear your talking speed will reassure them that they will be able to digest all of your content.
Some learning system video players will support a playback speed option to speed up or down your lesson. if this feature is available it would be great if they could be aware that this feature is available in case they need it
You should aim to speak at a moderate pace, neither too fast nor too slow, to engage the widest range of students effectively.
When deciding which lessons to offer for free, consider those where you speak at a natural, steady speed, as opposed to lessons where you may speak more quickly because you may know the content super well or are just very excited about that topic.
Let People Hear Your Accent
Some prospects might worry that your accent, whether slight or strong, could make it difficult for them to understand you. Your end goal is to ensure customers are satisfied with their course purchase, and by previewing your accent, you can help prevent cancellations or negative reviews.
I love distinctive accents, whether Parisian, New Yorker, Mexican, Canadian, or others, as long as they do not interfere with clear communication.
Letting prospects hear your voice in advance reassures them that they will be able to follow and understand you throughout all the lessons in your creative course.
Video Player Device & Browser Compatibility
Prospects will want to verify that their video player works on their device and internet provider.
Desktop computers, tablets, and mobile phones operate on different browsers and operating systems. These browsers and operating systems may not support certain features of your learning technology platform.
Some of the media player features include:
- Video compression (Things like H.265 MPEG video)
- Audio encoding & compression (Things like AAC)
- Video window size, position – in the window, pop-up, full-screen
- Media controls like pause, skip back and fast forward can behave in funky ways on some configurations
Internet Speed & Geolocation for Online Courses
Prospective students may have internet speeds ranging from fast and reliable fiber connections to slow and inconsistent ones. Offering a free lesson video allows them to test whether they can view the content without experiencing audio or video issues.
Your course content, including the website, videos, and course materials, will be hosted online. Some students may be located in other countries, which can result in additional latency when accessing your files. Additionally, access to your content may occasionally be restricted due to your policies, your country’s regulations, or the student’s country’s rules.
Your Camera Work Quality
Students want to see lessons recorded with high-quality cameras that remain steady on stands during teaching.
Cameras should have high megapixel counts (at least 4MP) to capture videos with a resolution of at least 720×480, though 1920×1080 is ideal. If you have the capacity and storage to record at 60 frames per second, opt for 60p. The “p” stands for progressive, meaning each video frame is drawn from top to bottom, unlike older TVs that use interlaced (I) scanning, which alternates between even and odd lines.
For PowerPoint lessons where you are recording yourself, you can use either a physical camera or your laptop’s built-in camera. If your laptop has an outdated webcam, consider upgrading to a high-end Logitech USB webcam or using a ring camera positioned behind your monitor or laptop.
Your cameras should remain stationary, mounted on tripods or securely attached to your computer or desk. A stable camera ensures students can follow along without the distraction of shaky footage.
Depending on the quality you are going for, you may want to use multiple cameras. This allows for one primary shot watching you speak as well as a secondary camera that may be used for variety but more often is used as a closeup on what you are teaching. Think about how the PBS artist Bob Ross teaches painting with shots of him talking to the audience as well as close-up shots of him painting with a fan brush.
Keep in mind that editing multiple camera angles and synchronizing audio across different video sources can be more complex and costly. Only pursue this approach when you are prepared to invest in the tools and time required for that level of production quality.
Course Preview Lighting
Good lighting is essential for your course preview. You’ll want proper lighting on your face as well as in the room.
Adequate lighting on your face will help students clearly see your eyes, eyebrows, and mouth, allowing them to catch the subtle nuances beyond your words.
It’s also important for the room to be lit correctly, so the overall video isn’t too dark and so that students can see any props or hand gestures you make.
In general, a dark video will appear low quality. If this happens, you can either try to brighten the video in an editing app or re-record it with better lighting.
If you’re not familiar with lighting techniques, look up “3-point lighting” online. Using 3-point lighting will provide a strong front light for your face, combined with side and back lights for a well-balanced setup.
Here are some good resources:
- three-point-portraiture-lighting-and-beyond
- everything-you-need-to-know-about-the-3-point-lighting-setup
- expertphotography.com
Editing Quality Of Your Courses
Your course preview is a chance for you to demonstrate your post-production work that makes your class better than others.
Some post-production work that can add value include:
- Intro sequence
- Title slide
- Multiple camera angles
- Zoom in shots
- Slides with content
- Overlay with text and graphics
- Outro video
The Audio Quality Of Your Mic and Studio
Students will want to verify that the course audio is clear and that you have used a high-quality microphone they’ll also want to make sure that there are no unnecessary background sounds on your video.
You should have used a lapel mic (the little padded mic that you clip to your shirt) or at least sat right in front of your laptop or phone on a ring/tripod to record your course. This way your mouth has a direct sound path to the microphone.
You’ll also want to think about how during the lesson you may move. For example, if you are a guitar teacher – you may twist, move, and bend as you teach. So you will not only be taught to straight to the camera and mic but also talk as you move to use other equipment like a stand with sheet music, amplifier, foot pedals, and speaker controls.
Does Your Course Support Closed Captions or SubTitles?
To help with the learning process, your art or design course can include text of what you are saying.
Text can be closed captions (CC) like what is shown on Television programs (included with video signal), or sub-titles which is when text is shown (often burned) on top of a video.
Seeing words, especially new words that they don’t know on the screen can help students learn new materials.
Showing what you are saying can help your students if you have an accent.
Sub-titles can also include translations to other languages. This is usually part of your learning platform content management system, but can also be manually added by third parties for you. Supporting other languages can really help your sales to new markets.
Do Your Course Previews Demonstrate Accessibility Support
When websites are designed to support people with disabilities they are called accessible. Some of your students will care about accessibility support in your courses before buying them.
Having n accessible course includes high-contrast colors big buttons a web standards HTML browser, and closed captions and sub-titles for those with hearing impairments.
For more information on Accessibility, consider these sites:
- https://www.w3.org/WAI/fundamentals/accessibility-intro/
- https://www.adobe.com/accessibility/gettingstarted.html
- https://www.usability.gov/what-and-why/accessibility.html
Your Course Free Previews Should Show A Professional Set
Your course preview should use a professional-looking background or “set”. Whether the set is a major space all around you in the course videos or simply your outer edge around your face and shoulders, it’s important to show that you are serious and professional about your work environment.
If most of the time you are simply a small talking head on a slide show, then you can utilize a real room in your home or office. Just pick out a background where you have a clean wall and some light furniture like chairs or coffee tables. Maybe try to enhance the scene with a few pieces of artwork, plants, or books.
When your lesson takes place in your workspace, then you may be able to use your current work environment with a little tidying up. Many beginners and amateurs will actually get excited to see a professional environment with all the miscellaneous tools, samples, and wear and tear; so don’t sterilize your work area.
One of the most popular options is to use a wall or solid-colored paper/cloth backdrop at the back. Then you would have staged basic furniture like a planter, bookshelf, or lampstand in the middle. Finally, you would be in front of any props such as an easel, musical instrument, or sewing machine. This is how most high-end courses create sets.
Some people may want to use greenscreen for their lesson, to either show a solid background or a fake background of a perfect office or library. If necessary, go for a simple solid or gradient background to hide your background. Greenscreen can end up leaving a halo around you and create weird visual effects as you move your hands and props in and out of focus.
You will also have to choose your clothing correctly, to make sure you are not wearing the color key color such as green. When the color removal starts to fail may be due to your hair or hands, it could end up being an expensive and time-consuming editing process to properly remove your background. In addition, some prospects may find that you are putting not being authentic and may become suspicious.
Show The Quality Of Your Slides
Depending on what you teach, a preview class could allow prospective students to see the quality of your PowerPoint, keynote, or google slides.
High-quality decks use good templates with consistent themes for colors, backgrounds, logos, headers, and footers.
Good learning decks use large, short, and descriptive titles on every slide.
Most educational slides should leverage established layouts like 1 big picture, 1 column, 2 columns, 1 paragraph, and 1 chart format.
You should have clear chunks of structured content on your slides. From far away, you should see 1 or more islands of information.
When you use bullets, try to make them parallel and related thoughts. Visually it looks good when bullet lines are similar lengths. Also pay attention if you are making an unordered list with sibling bullets or a sequential list using 1,2,3 or a,b,c.
Include An Intro Video
As an alternative to or in addition to any free lessons, you can include an intro video about your course.
This intro video could be on the landing page of your course or it could be one of your intro videos at the beginning of your course.
You can use this video to share a summary of what you will be teaching in your own words. This video will also reviewal your AV skills, speaking style, and teaching style.
If you are concerned about giving away some of your lessons, then you should consider using an intro video so that prospects can virtually meet you and feel comfortable with your style prior to purchase.
How Many Lessons To Make Free
You may like the idea of free previews for your course, but you don’t want to give away everything.
A good strategy is to give away at least 1 to 3 short lessons. This is enough where they can get a good feel for you to remove any doubts about your communications, expertise, and teaching style.
If your teaching style and content are very different across modules, you may want to provide a free preview in multiple modules. For example, one lesson where you talk to the camera, another where you are talking to a slide, and another where you are holding or using a prop.
Some course creators may prefer to make a small free course to let their prospects see them in action before they purchase a more expensive course. But if your prospect somehow found out about your premium course, you still want to give help them get comfortable with you before.
Giving Away Some Your Best Lessons
Most course creators don’t want to give away their most valuable content, because they want prospects to eventually buy the content.
However, some people believe, that if you give away a very high quality or valuable lesson, prospects could think that if this amazing content is free, the premium lessons will be even better.
You can also choose to give away a shorter clip of the best lesson on your sales page. You don’t need to use the real full lesson from your outline.
You can also decide to strategically chop up your sections and lessons not only from an educational point of view but also from a sales point of view.
Should You Require Registration For Free Previews?
Free previews should help you land more customers, but there is a strategic decision point you need to think about. Should you force a registration process to access the preview, or should you allow open access to anyone who clicks the preview button?
If you force a registration process, then some users will opt out of that. However, those that do register will leave you with their email, that you can follow up with in the future to see if they are ready to buy or even offer them a coupon.
If you don’t require registration, then you will end up with a higher number of prospects that see your previews. If you have good quality previews, then more people watching previews should lead to more sales.
Offering Free Lesson Previews – Summary
In conclusion, free lesson previews help creative course sales.
Choose a few smart lessons for your free previews.
Lessons that are:
- Well produced but don’t give away everything
- Show different teaching styles and camera angles
- You giving your very best self to your students
You should be a little more smarter now. Thanks for hanging out!
Please subscribe to get more tips for creative online course teachers.
These lessons can also help you with Education and Course Content: