Canva is a great free online design tool with powerful features and royalty-free content you can embed.
You can use it to create images and illustrations for your course lessons or resource materials.
It is easy to use and not as complex as Photoshop, Illustrator, or Inkscape.
Best of all, most essential features and sample content are available for free.
Video Overview
Lesson Graphics
If you use PowerPoint or Google Slides to teach your course, you know that your diagrams are limited to basic shapes and lines.
To enhance your visuals, consider using external tools like Canva to create high-quality graphics that you can add to your lesson decks.
If you primarily teach through 1:1 videos, Canva can also help you design full-screen graphics, sidebar information, or overlay graphics to support your content.
Resource Materials
Canva allows you to create full multi-page guides and checklists.
I prefer to design vertical PDFs using tools like Google Docs or Word and then enhance them with custom graphics made in Canva, Photoshop, Paint.net, Illustrator, or Inkscape.
These visuals can be used for a title page, a decorative footer, or informative graphics that support the main text on each page.
When to Use Canva
I like using Canva when a design is too complex for simple shapes in Google Docs or Sheets but not complex enough to justify a high-end graphics program.
Canva is smart, with great defaults and only the most essential options. Unlike other software that overwhelms with too many settings, Canva keeps things simple and intuitive.
For me, it’s the perfect “Goldilocks” tool—just right for creating intermediate-level graphics that are neither too simple nor too complicated.
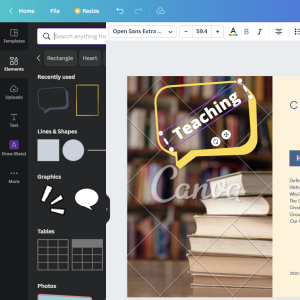
Key Tools
The key tools in Canva are made up of:
- Template – an example layout with a bunch of elements that you can modify
- Background – A background picture for your layout
- Text – Text that you can style and position anywhere
- Elements – A giant library of pictures and shapes that you can put
- Uploads – Your assets like your logo and custom backgrounds
- Toolbar – Tools to modify the current item like color, font, position, delete
The app also offers cool drag and drop placement and positioning features. When you move an item, dynamic grid lines appear to help you place it precisely whether centered aligned with padding on the left or perfectly in line with other elements.
Pro Stuff
Just so you know, there is a pro version of Canva. If you’ve tried free Canva and it works for you, and need the extra features, it’s very affordable.
Here are some of the things in the pro version:
- More pre-made templates
- More image resources that you can drop in
- Output PNG files with transparent backgrounds
- Better resizing of outputs
- Customize and add your own brand fonts
Oh, and the pro features include better team support for sharing and collaborating on designs.
Wrap Up
Canva is free, powerful, and intuitive, with a variety of royalty-free layouts and content that help you create stylish supporting graphics in just 15 minutes.
I haven’t even touched on its video features since my focus is on creating visual aids for course content.
Next time you need a quick illustration, take 30 seconds to consider the complexity of the task. If it’s moderately complex and you have beginner to intermediate design skills, Canva is the perfect place to start.
Get Canva
To start using Canva to create your course illustrations, visit Canva.com to create a free account and start mocking up designs in minutes.
So now, you’re a lot smarter. Thanks for hanging out!
Please subscribe to get more tips for creative online course teachers.
These lessons can also help you with Tools and Course Content:
- Teaching Online Using Barak Rosenshine’s Principles of Instruction
- How to Use Facebook Ads for Online Teachers and Coaches
- Zapier Business Automation for Online Teachers
- Artificial Intelligence Tools for Online Course Creators